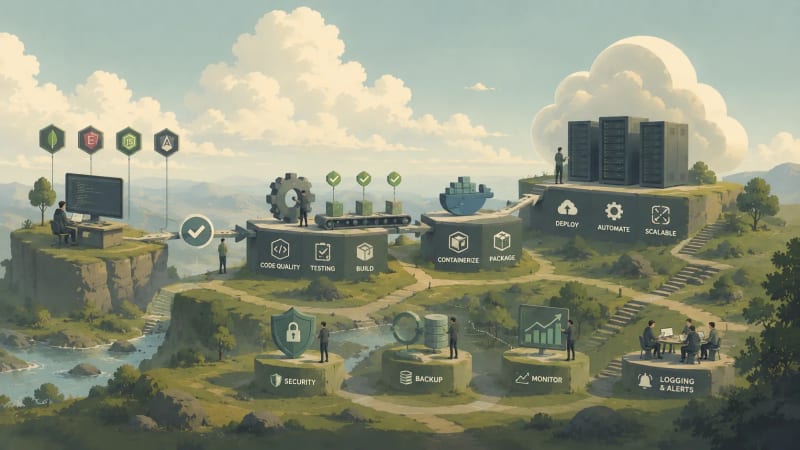

What is Deployment?
Introduction
Imagine you've built a beautiful website on your laptop. You can access it at localhost:4200 for Angular and localhost:3000 for your Express server. Everything works perfectly on your computer, but only you can see it.
Your friends, users, or clients can't visit your website because it only exists on your local machine. This is where deployment comes in.
What "Going Live" Means
Deployment is the process of taking your application from your local development environment and making it available on the internet so that anyone, anywhere in the world, can access it.
Think of it like this:
- Before deployment: Your app is like a restaurant you built in your backyard. Only you and your family can eat there.
- After deployment: Your app is like opening a real restaurant on a busy street. Anyone can walk in and use it.
Development vs Deployment
| Aspect | Development (Your Laptop) | Deployment (Production Server) |
|---|---|---|
| URL | localhost:3000, localhost:4200 |
www.yourwebsite.com |
| Performance | Doesn't matter much | Must be fast and optimized |
| Errors | You see them immediately | Users see them (bad!) |
| Database | Local MongoDB | Cloud MongoDB (MongoDB Atlas) |
| Security | Not critical | Extremely important |
MCQ
What does "Going Live" or deployment mean in web development?
- Running your website locally on
localhost:3000orlocalhost:4200 - Making your website available on the internet so that anyone can access it
- Testing your website only on your laptop before showing others
- Writing new features for your website
What is Hosting?
Understanding Hosting in Simple Terms
When you turn off your laptop, your website stops working because it was running on your computer. For your website to be available 24/7, it needs to run on a server — a powerful computer that's always on and connected to the internet.
Hosting means renting space on these special computers (servers) to store and run your application.
Think of hosting like renting an apartment for your website:
- Your laptop: Your home (private, only you have access)
- Hosting server: An apartment building (shared or dedicated space)
- Hosting company: The landlord (maintains the building)
- Rent: Hosting fees (monthly/yearly)
Just like you need a physical space to open a shop, your website needs a digital space on the internet — that's hosting.
What a Hosting Server Provides
A hosting server gives your application:
| Resource | What It Means | Why You Need It |
|---|---|---|
| Storage | Hard drive space to store your code | To keep your files (HTML, CSS, JS, images) |
| RAM | Memory to run your application | To handle user requests |
| CPU | Processing power | To execute your code |
| Bandwidth | Data transfer limit | To send your website to users' browsers |
| Internet Connection | 24/7 connectivity | So users can access it anytime |
MCQ
What does hosting mean in web development?
- Storing your website only on your personal laptop
- Uploading images and videos to your website
- Renting space on special computers (servers) to store and run your application
- Designing your website using HTML and CSS
Types of Hosting
Shared Hosting
In shared hosting, your website shares a server with many other websites, much like sharing an apartment with roommates. This type of hosting is cheap and easy to use, making it ideal for beginners. However, it can be slow and has limited resources since multiple sites use the same server.
Examples: Hostinger, Bluehost
Best for: Simple blogs and basic websites
Cloud Hosting
In cloud hosting, your website runs on multiple connected servers, similar to owning apartments in different buildings. This setup makes your website more reliable, scalable, and faster since resources can be balanced across several servers. However, it can be more complex to manage and configure.
Examples: AWS, Google Cloud, Render, Netlify
Best for: Modern web applications such as MEAN stack apps
VPS (Virtual Private Server)
In VPS hosting, you get your own virtual server space, similar to having your own apartment within a shared building. It provides more control and better performance compared to shared hosting, but it requires some technical knowledge to manage.
Example: DigitalOcean Droplets
Best for: Growing applications that need more power and flexibility
Dedicated Server
In dedicated hosting, you get an entire physical server just for your website — it's like owning the whole building instead of sharing it with others. This type of hosting offers maximum control, performance, and power, but it is also expensive and requires expert technical knowledge to manage.
Best for: Large companies and high-traffic websites
MCQ
Which of the following statements correctly matches the type of hosting with its description?
- Shared Hosting — You get an entire physical server just for yourself.
- VPS Hosting — Your website runs on multiple connected servers for better reliability.
- Cloud Hosting — Your website shares a server with many others.
- Dedicated Hosting — You have full control over an entire physical server, offering maximum power and performance.
Types of Environments
What is an Environment?
An environment is the place where your application runs. As a developer, you'll work with two main environments throughout your development journey.
Think of environments like different stages of building a house:
- Development environment: You're building the house (experimenting, making changes, fixing mistakes)
- Production environment: The house is complete and people are living in it (stable, reliable, no breaking changes)
Development Environment
You use your local computer for writing new features, testing code, fixing bugs, and experimenting. It runs on localhost, giving you full control to make changes. Only you can access it, and errors are fine since it's a learning space.
Example URLs
- Angular:
http://localhost:4200 - Express API:
http://localhost:3000 - MongoDB:
mongodb://localhost:27017
Production Environment
This is the live server on the internet where real users access your application. A deployed application is live on the internet with a public URL like www.myapp.com, accessible to anyone worldwide. It runs 24/7, with optimized, secure, and error-free code for the best performance. Deployment happens after development and testing, when you're ready for real users, clients, or to showcase your work professionally.
Environment Variables
When you build an app, it behaves differently on your computer (development) and on the server (production). Instead of changing code every time, we use environment variables — special settings that tell your app where it's running and what values to use.
Example in Node.js
Development (.env file)
DATABASE_URL=mongodb://localhost:27017/myapp
PORT=3000
Production (.env file on server)
DATABASE_URL=mongodb+srv://user:pass@cluster.mongodb.net/myapp
PORT=3000
Example in Angular
Development (environment.ts)
export const environment = {
  production: false,
  apiUrl: 'http://localhost:3000/api'
};
Production (environment.prod.ts)
export const environment = {
  production: true,
  apiUrl: 'https://myapp-api.onrender.com/api'
};
MCQ
Which statement correctly describes the production environment?
- It runs on localhost and is only accessible to the developer.
- It's where you write and test new code with frequent errors.
- It's the live server accessible to everyone on the internet, and it must be stable and optimized.
- It uses local MongoDB and doesn't need security.
MEAN Stack in Production
Where Each Component Lives
When you develop locally, everything runs on your computer. But in production, each part lives in a different place.
M — MongoDB (Database)
- Development: Your local computer
- Production: MongoDB Atlas (cloud)
- Why Atlas? Free tier, automatic backups, always online
E + N — Express & Node.js (Backend)
- Development: Your laptop (
localhost:3000) - Production: Cloud platforms like Render or Railway
- What it does: Handles API requests and connects to the database
A — Angular (Frontend)
- Development: Your laptop (
localhost:4200) - Production: Platforms like Netlify or Vercel
- What it is: The user interface (what users see)
In our production setup, we use different cloud services for each part of the app. The frontend (Angular app) is hosted on Netlify, the backend (Express API) is hosted on Render, and the database is stored on MongoDB Atlas. Using separate cloud services makes our app faster, more reliable, and easier to manage than putting everything on one server.
Example Flow
User's Browser
   ↓
Angular App (Netlify)
https://myapp.netlify.app
   ↓ Makes API calls to
Express API (Render)
https://myapp-api.onrender.com
   ↓ Queries database
MongoDB (Atlas)
cluster.mongodb.net
MCQ
In this production setup, where is each part of the MEAN stack hosted?
- Angular on Render, Express on Netlify, MongoDB on Atlas
- Angular on Netlify, Express on Render, MongoDB on Atlas
- Angular on Atlas, Express on Netlify, MongoDB on Render
- Angular, Express, and MongoDB all on the same local server
Hosting Options
Your MEAN stack app has three main parts: database, backend, and frontend. Each of these needs a separate place to run when hosted online. Hosting can be free or paid, and the choice depends on your project needs and budget.
Free vs Paid Hosting
Free Hosting
- Cost: ₹0 — an excellent choice for students, beginners, and portfolio projects
- Performance: May be slower or temporarily inactive (sleep) when not in use
- Best for: Learning, experimenting, and small-scale personal projects
- Why choose it: Lets you practice real deployment without spending money,ideal for early-stage developers.
Paid Hosting
- **Cost:**It is not fixed, Varies depending on the provider and plan.
- Performance: Always online, faster response times, and higher uptime
- Best for: Production-ready applications, business platforms, or high-traffic sites
- Why choose it: Offers dedicated resources, scalability, and reliability that support serious or commercial projects.
MCQ
Which hosting type is best suited for beginners and small MEAN stack projects?
- Free Hosting
- Paid Hosting
- Cloud Hosting
- Dedicated Server
Environment Variables
What Are Environment Variables?
As we already learned, your MEAN stack app behaves differently in development and production. To manage these changes safely, we use environment variables.
Environment variables act like small containers that hold important configuration detalls such as database links, port numbers, or API keys without hardcoding them directly Inside your code.
For example, in a Node.js app, instead of writing the MongoDB URL Inside your code, you can store it in a env file like this: Create a file named.env in your project folder and add your values this way
Example .env
MONGO_URL=mongodb+srv://username:password@cluster.mongodb.net/myapp
PORT=3000
Accessing Variables in Node.js
process.env.MONGO_URL
process.env.PORT
Your app will now take the values from the .env file instead of hardcoding them.
MCQ
Why do we use environment variables in an app?
- To store temporary files
- To style the frontend
- To increase app speed
- To hide and manage sensitive information like database links
Building Your Angular App
When you build an Angular app for production, you're preparing it to run fast and efficiently on the internet. During development, you use ng serve, which runs a local server on your computer for testing. But this mode is not optimized for real users.
Command to Build
ng build --configuration production
This command tells Angular: create a version of my app that's optimized for the real world.
It creates a folder such as dist/your-app-name/ containing ready-to-deploy files like:
index.htmlstyles.cssassets/
What --configuration production Does
| Feature | What It Means | Why It Matters |
|---|---|---|
| Optimization | Makes your files smaller | App loads faster |
| AOT Compilation | Converts templates to JS before running | Faster startup time |
| Minification | Removes spaces, comments, and extra code | Reduces file size |
| Tree Shaking | Removes unused imports or functions | Only keeps what's needed |
| Output Hashing | Adds unique names to files | Prevents browser caching old versions |
| Environment Swap | Replaces environment.ts with environment.prod.ts |
Uses live API instead of localhost |
Environment Example
// environment.ts (development)
export const environment = {
  production: false,
  apiUrl: 'http://localhost:3000/api'
};

// environment.prod.ts (production)
export const environment = {
  production: true,
  apiUrl: 'https://myapp-api.onrender.com/api'
};
During the production build, Angular automatically replaces the development file with the production one.
MCQ
What does --configuration production do in Angular?
- Runs your app locally for debugging
- Creates an optimized, minified version ready for hosting
- Installs project dependencies
- Builds the backend server
Frontend to Backend Access
Now that your frontend and backend are both deployed, you must ensure that your Angular app can securely communicate with the Node.js + Express API. Browsers block unauthorized requests by default. This is where CORS and environment variables come in.
Allowing Frontend to Access the Backend (CORS)
When your Angular frontend, such as https://mybookstore.netlify.app, tries to access your backend, such as https://bookstore-api.onrender.com, the browser checks if the backend allows requests from that origin.
If not, you'll get a CORS error.
Example CORS Setup
app.use(cors({
  origin: 'https://mybookstore.netlify.app',
  credentials: true,
  methods: ['GET', 'POST', 'PUT', 'DELETE']
}));
Using Environment Variables in the Backend
Never hardcode sensitive information like DB passwords or API keys. Instead, use a .env file.
.env
PORT=3000
MONGO_URL=mongodb+srv://user:password@cluster.mongodb.net/bookstore
server.js
import dotenv from 'dotenv';
dotenv.config();

app.listen(process.env.PORT, () => {
  console.log(`Server running on port <span data-math-inline-placeholder="vhz909wvw"></span>` or `.` characters from user input to stop NoSQL injection
- **xss-clean:** Cleans input data to block cross-site scripting (XSS) attacks

## 4. Apply Rate Limiting and Helmet

Limit requests to stop brute-force attacks and add security headers automatically.

Example:

```js
app.use(rateLimit({ windowMs: 15 * 60 * 1000, max: 100 }));
app.use(helmet());
- Helmet: Adds security headers to protect against common attacks like XSS or clickjacking
- Rate limiting: Restricts how many requests a user can make in a given time to prevent brute-force or DoS attacks
MCQ
Which of the following best prevents brute-force or DoS attacks?
- Using CORS
- Applying Helmet
- Implementing rate limiting
- Logging errors
Protecting Your Frontend
Even if your backend is secure, your frontend (Angular) can still become a weak point if not handled properly.
1. Use HTTPS for All Requests
Always make API calls to https:// endpoints only. This keeps data safer from interception.
2. Avoid Exposing Secrets in Angular Code
Never store API keys or sensitive information inside environment.ts or any frontend file. Users can inspect frontend code in browser dev tools.
3. Implement JWT Authentication Properly
Store tokens securely in HTTP-only cookies, not in localStorage, to reduce exposure to malicious scripts.
4. Validate User Inputs on the Client Side
Basic validation, such as email format and required fields, improves user experience and reduces bad requests.
5. Keep Angular Updated
Regularly update Angular and dependencies:
npm update
New releases often patch security vulnerabilities.
MCQ
Which is the most secure way to store a JWT token in a frontend Angular application?
- In an HTTP-only cookie
- Inside a global variable
- In
sessionStorage - In
localStorage
Writing Clean Code
Building a full-stack MEAN app isn't just about making it work. It is also about writing readable, maintainable, and efficient code. Clean code helps your teammates, and your future self, understand and improve your work more easily.
1. Use Meaningful Names
Choose descriptive names for variables, functions, and files.
Example:
getUserById()
Instead of:
gotData()
2. Follow Consistent Formatting
Use tools like Prettier or ESLint to keep your code style consistent. Spacing, indentation, and quotes all matter for readability.
npm install --save-dev prettier eslint
3. Break Code into Small Functions
Each function should do one thing only. This makes testing and debugging much easier.
Examples:
calculateTotalPrice()
applyDiscount()
sendInvoice()
4. Organize Folder Structure
Keep related files together:
backend/
  routes/
  controllers/
  models/

frontend/
  src/app/components/
  src/app/services/
5. Avoid Repetition
Don't copy-paste logic across files. Reuse code through helper functions or shared services.
MCQ
Which of the following best describes clean code practice?
- Writing long functions that handle multiple tasks
- Using meaningful names and small, focused functions
- Avoiding comments altogether
- Ignoring formatting tools for faster development
Making Your App Faster
A fast app keeps users happy and reduces server load. Here are some simple ways to make your MEAN stack app run smoothly.
1. Use Caching
Store frequently used data temporarily to avoid hitting the database again and again.
Example:
- Use Redis or in-memory caching for API responses
2. Optimize Database Queries
Avoid fetching unnecessary data.
Example:
User.find({}, 'name email')
Instead of fetching everything with:
User.find()
3. Use Compression
Compress responses before sending them to the client to reduce loading time.
import compression from 'compression';
app.use(compression());
4. Lazy Load in Frontend
Load heavy components or images only when needed, not all at once. This helps Angular apps start faster.
5. Minify and Bundle Assets
Use Angular's production build:
ng build --prod
This minifies JavaScript, CSS, and HTML, making files smaller and faster to load.
MCQ
Which of the following helps reduce the initial loading time of an Angular app?
- Fetching all data at once
- Avoiding compression
- Using inline scripts everywhere
- Lazy loading modules
Monitoring Your Live App
Once your app is live, your work doesn't stop there. Monitoring and error handling help your app keep running smoothly and make it easier to fix issues before users notice them.
1. Use Logs Effectively
Logs tell you what's happening inside your backend. For basic tracking, you can log every request like this:
app.use((req, res, next) => {
  console.log(`${req.method} ${req.url}`);
  next();
});
For production, it's better to use tools like Winston, Morgan, or Sentry. They help store, organize, and analyze logs more efficiently.
2. Monitor Server and Database Health
- Use PM2 for Node.js apps to track live metrics like CPU and memory usage
- PM2 can automatically restart your app if it crashes
- In Docker, you can use
docker statsto view container performance - In MongoDB Atlas, the Performance tab helps monitor slow queries, memory usage, and connections
3. Handle Errors Gracefully
Instead of writing error handling in every route, use a centralized error handler:
app.use((err, req, res, next) => {
  console.error(err.message);
  res.status(500).json({ message: 'Something went wrong on the server.' });
});
In the frontend, show friendly messages such as:
Something went wrong. Please try again later.
This gives a better user experience than showing technical details.
MCQ
Why should you avoid showing detailed error messages to users in production?
- To make the app look simpler
- To prevent exposing sensitive system or code information
- Because users don't read error messages
- To reduce server memory usage
Version Control with Git
Why You Need Version Control
Imagine you're building your MEAN stack bookstore app. You add a new feature, and suddenly everything breaks. Without version control, you'd have to manually undo changes across dozens of files — or worse, start over.
Version control is a system that keeps a full history of every change you make to your code. You can go back to any previous working state at any time.
Think of it like this:
- Without Git: You're writing a novel with no "Undo" button. One bad edit can ruin everything.
- With Git: Every chapter is saved separately. You can jump back to any version instantly.
What is Git?
Git is a distributed version control system that lets every developer have a full copy of the project history on their own machine. It was created by Linus Torvalds in 2005 and is today the industry standard for tracking code changes and collaborating on projects.
Unlike older systems, Git doesn't rely on a single central server. Every developer's copy is a full backup of the entire project — commits, branches, and history included.
Core Concepts
| Concept | What It Is | Simple Analogy |
|---|---|---|
| Repository (repo) | Folder tracked by Git | Your project's version-controlled home |
| Commit | A saved snapshot of changes | A save point in a video game |
| Branch | Isolated copy to work on a feature | A draft copy of a document |
| Merge | Combining branches back together | Pasting draft changes into the final document |
| Remote | The copy of your repo on GitHub | A backup drive in the cloud |
Setting Up Git for Your MEAN Stack Project
Step 1: Initialize Git
Inside your backend or frontend project folder, run:
git init
This creates a hidden .git folder that starts tracking your project.
Step 2: Create a .gitignore File
You don't want to push sensitive files like .env or heavy folders like node_modules. Create a .gitignore:
node_modules/
.env
dist/
This keeps your repository clean, secure, and lightweight.
Step 3: Make Your First Commit
git add .
git commit -m "Initial project setup"
git add .— stages all changed files for savinggit commit -m "..."— saves a snapshot with a meaningful message
Step 4: Connect to GitHub and Push
git remote add origin https://github.com/yourusername/bookstore-backend.git
git branch -M main
git push -u origin main
Your code is now backed up on GitHub and ready for deployment platforms like Render to pull from.
Git Branching — Working Without Breaking Things
Never build new features directly on the main branch. Instead, create a separate branch for each feature or fix:
# Create and switch to a new branch
git checkout -b feature/user-auth

# After your feature is done, merge it back
git checkout main
git merge feature/user-auth
This way, your main branch always stays stable and deployable.
Essential Git Commands
| Command | What It Does |
|---|---|
git init |
Initializes a new repository |
git status |
Shows changed files |
git add . |
Stages all changes |
git commit -m "msg" |
Saves a snapshot |
git push origin main |
Uploads changes to GitHub |
git pull origin main |
Downloads latest changes from GitHub |
git log --oneline |
Shows commit history in one line each |
git checkout -b branch-name |
Creates and switches to a new branch |
Best Practices
- Write meaningful commit messages:
"Fix CORS error for production API"is far more useful than"fix stuff" - Commit small and often: One feature or fix per commit makes debugging easier
- Never push
.envfiles: Keep secrets out of your repository using.gitignore - Use branches for everything: One branch per feature, one branch per bug fix
- Pull before you push: Always run
git pullbefore pushing to avoid conflicts
MCQ
What is the purpose of git commit in version control?
- Uploads your code to GitHub directly
- Deletes all staged files from the project
- Switches to a new branch
- Saves a snapshot of staged changes to the local repository
Continuous Integration (CI)
Why CI Matters
In a team project, multiple developers push code to the same repository every day. Without automation, someone has to manually build and test the code each time before deploying — a slow and error-prone process.
Continuous Integration (CI) solves this by automatically building and testing your code every time a change is pushed.
Think of it like this:
- Without CI: Every time you submit a form, someone manually checks it for errors before filing it.
- With CI: A machine instantly validates the form and flags any mistakes the moment you submit it.
What is Continuous Integration?
Continuous Integration (CI) is the practice of automatically integrating code changes from multiple developers into a shared repository several times a day, with automated builds and tests running after each integration.
CI doesn't deploy your app. It verifies that your new code doesn't break anything before it even reaches production.
Popular CI Tools
While GitHub Actions is built directly into GitHub and requires no extra setup, other widely used CI tools include Jenkins (open-source, self-hosted, highly customizable), Travis CI (cloud-based, popular with open-source projects), CircleCI (fast pipelines with Docker support), and GitLab CI/CD (built into GitLab, similar to GitHub Actions).For MEAN stack beginners, GitHub Actions is the easiest starting point since your code is already on GitHub.
CI vs CD — What's the Difference?
| Feature | Continuous Integration (CI) | Continuous Delivery (CD) | Continuous Deployment (CD) |
|---|---|---|---|
| Main Focus | Integrate and test code frequently | Automate release up to staging | Fully automated releases to production |
| Deploys to Production? | No | Manual approval needed | Fully automatic |
| Human Involvement | Triggers automatically on push | Manual approval for final release | None needed |
For a student MEAN stack project, setting up CI is enough. CD can be added later for real-world apps.
Setting Up CI with GitHub Actions
GitHub Actions is a free CI tool built directly into GitHub. Every time you push code to your repository, it automatically runs a workflow you define.
Step 1: Create the Workflow File
In your backend project, create this file:
.github/workflows/ci.yml
Step 2: Write the CI Workflow
name: MEAN Stack CI

on:
  push:
    branches:
      - main
  pull_request:
    branches:
      - main

jobs:
  build-and-test:
    runs-on: ubuntu-latest

    steps:
      - name: Checkout Code
        uses: actions/checkout@v3

      - name: Set Up Node.js
        uses: actions/setup-node@v3
        with:
          node-version: '18'

      - name: Install Dependencies
        run: npm install

      - name: Run Tests
        run: npm test
Every time you push to main, GitHub automatically:
- Checks out your latest code
- Installs
node_modules - Runs your test suite
If a test fails, GitHub marks the push as failed and notifies you — before any broken code reaches your users.
Step 3: Add a Basic Test (Node.js + Express)
If you don't have tests yet, here's a minimal example using Jest:
npm install --save-dev jest supertest
// tests/app.test.js
const request = require('supertest');
const app = require('../server');

test('GET /api/books returns 200', async () => {
  const res = await request(app).get('/api/books');
  expect(res.statusCode).toBe(200);
});
Add this to package.json:
"scripts": {
  "test": "jest"
}
Now every CI run will verify your API is healthy.
CI in Your MEAN Stack Workflow
Developer pushes code to GitHub
   ↓
GitHub Actions triggers automatically
   ↓
CI installs dependencies (npm install)
   ↓
CI runs tests (npm test)
   ↓
Pass: Code is safe to deploy
Fail: Developer is notified to fix the issue
This loop makes sure broken code never silently reaches your Render backend or Netlify frontend.
Benefits of CI for MEAN Stack Projects
- Catches bugs early — errors are found right after the bad commit, not weeks later
- Automates repetitive checks — no need to manually run
npm install && npm testevery time - Safer collaboration — team members can push code without fear of silently breaking the app
- Deployment confidence — you know your code is tested before it reaches platforms like Render
MCQ
What does Continuous Integration (CI) primarily do in a MEAN stack project?
- Deploys your Angular app to Netlify automatically
- Replaces environment variables during build
- Stops developers from creating branches
- Automatically builds and tests your code every time a change is pushed to the repository